FREE Nationwide Shipping - Factory Direct Pricing Since 2006 - Top Rated Expert Service

  • account
  • phone
topimgNorton
5 Star Excellence award from Shopper Approved for collecting at least 100 5 star reviews

Cart is empty

×

  Home » Catalog » Large Storage Sheds & Buildings » Lifetime 15x8 Plastic Garden Shed Kit w/ Floor (6446) » Reviews

Shopping Cart

0 items

Manufacturer

Store Reviews

shopperapproved

Sheds Direct Stores LLC BBB Business Review

Shop By Price

caller

Question's?

caller ring
Call us
1-877-30-sheds

7 am to 11 pm cdt

7 days a week !

Send Email
fast-delivery

3 - 10 Days to your Home

Customer Reviews
sinceTag
5 Star Excellence award from Shopper Approved for collecting at least 100 5 star reviews

Payment

visa
master
american
discover
paypal
Now Offering Paypal Credit Pay Later!
Sheds Direct Stores LLC BBB Business Review
ShedsForLessDirect.com has earned the TrustedSite certification by maintaining a high level of website safety standards and good business practices.

Shed Reviews

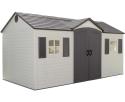
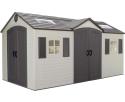
Lifetime 15x8 Plastic Garden Storage Shed Kit w/ Floor

This was a very good purchase from a solid company. Delivery ..

5 of 5 Stars!

Tell A Friend

Lifetime 15x8 Plastic Garden Storage Shed Kit w/ Floor
[6446]
$2999.99 $1919.95
separator
by V. Cordato Date Added: Wednesday 19 October, 2016
separator I would like to say that dealing with shedsforlessdirect.com has been a pleasure. Shipping and delivery was on time and the quality of this Lifetime 15' x 8' shed is outstanding. I'm writing this review to also give future buyers some tips and tricks I learned along the way to at least make your install more pleasant.
First off I pretty much put this shed together myself other than needing another persons assistance to get the 1st front wall and first wall corner attached and then it stood up on it's own and also to hold the doors in place while I installed the front roof gable.
Now from the beginning...
The foundation:
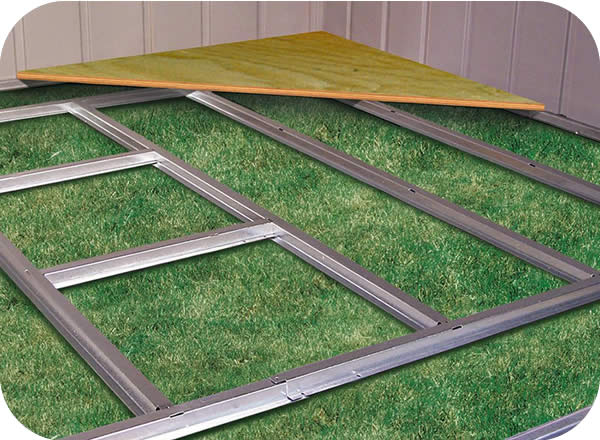
you have choices as for what you'll use for a floor foundation. I chose to level out the soil where I was installing the shed and frame out the perimeter of the floor with double 6" x 2" which is what is going to support the entire weight of the shed itself,
inside the wood frame I used sand as a base and laid down 8"x16" patio blocks for the floor foundation... the floor and outer wood floor frame needs to be as perfectly level as you can get it or else you are going to have a tough time. This was a 1 day job within itself.
The shed:
Tip 1 - If the shed boxes are being store outdoors until you get to your project then open them up and find the instructions booklet. It is not wrapped in a plastic bag like you would expect so if they get wet like mine did then you will be drying them with a hair dryer, besides you will also want to read them prior to the day of install... then read them again. No Joke!

Tip 2 - There are a few things that you can pre-built and prepare before the actual installation as you will notice after reading the instructions that of course will save you some install time which is putting together the roof trusses, the doors with latch mechanism and the side gables with screen vents.

Tip 3 - When clipping together the floor sections it takes a little finesse... have something heavy holding the first floor section flat in place or have someone hold or stand on it while you align the clips and while holding the 2nd floor section... give some quick up and down shakes to have the clips of the floor sections wiggle in place. Continue the same for the rest of them.

Tip 4 - Have someone hold the first straight wall sections while you attach the 1st corner wall section and secure them with screws. This will allow it to hold itself up while you work your way around the shed.

Tip 5 - When you get to installing the last roof truss which is the center one that attaches to the center gable and front roof section... you may have a problem attaching the long round bar that attaches to the trusses on both sides because it is too short. Yep... it means the whole leveling thing was just a bit off. Mine was off by approximately an inch and there was no way of pulling or pushing the outer trusses together by hand. NOW THIS WAS A LIFE SAVER. Use a long enough ratchet tie down strap placing it around the 2 outer trusses on each side of the center truss and placing the strap under the center truss to hold it up in place. Ratchet the strap tight a little at a time until you are able to insert and tighten the 2 nuts and bolts that attach the long round bar from the center truss to the 2 outer trusses. As I said, this was a life saver.

Tip 6 - have the front roof panels, front gable and roof rain gutters inside the shed with you before attaching the doors and front gable. Then have someone with you hold the doors when installing them... lock the one door after installing the hinge pole and then install the second door and latch them shut while you are inside the shed and have someone hold them in place so they don't fall. You can now put the front gable on over the doors hinge poles. Even though you may have attached the one screw to hold the front gable in place to the center truss, you will find that the doors are very heavy so opening and closing them at this point without having the rain gutters and front roof sections in place to support them really isn't wise.

There were other small things but the main heart wrenching ready to throw your hammer moments I listed above. YOU FINISHED! so take lots of pictures and send em to your friends. Make sure you boast about having the best looking shed in the neighborhood for half the price of your neighbors wood one that he's going to need to paint or treat every year. :)

Rating: 5 of 5 Stars! [5 of 5 Stars!]
separator
separator
separator Back Write Review separator

Add to CartAdd to Cart